
I started baking gluten-free sourdough bread in July when I shared some of my tips on how to get started. Now I thought it’s time to share things I have learned, as they are something many of us gluten-free bakers will have found a challenge. The recipes I use are mainly from the wonderful gluten-free baking course by Naomi Devlin, which you can find here and unfortunately are not mine to share. I hope you still find my practical insights helpful on your journey with GF sourdough baking or even gluten-free baking in general.
Why did my bread collapse?
A question I see often asked in gluten-free sourdough baking is why has the bread collapsed in the oven after looking so great when one put it in. Often I see people answer “it’s just how gf sourdough behaves, it’s best to make small flat breads that you don’t even expect to rise much”. This is a major bugbear of mine as I find this is not the case at all.
When the bread collapses it is typically due to overproving the dough. The amount of gas in the dough from the activity of yeasts exceeds the ability of the bread’s support network to hold it in and causing the gas to escape to the surface, often getting trapped under the crust which has hardened and then pushes the crust up leaving a cavern underneath which is typically called the ‘flying crust’. The rest of the dough sediments at the bottom as a dense layer that is left gummy as the moisture can’t evaporate anymore due to the lack of surface area, so no amount of baking really will fix the bread. The key is to take note and prove for a shorter time next time. I have had my share of overproves and will get more as I try new recipes and my starter is stronger and more mature now so seems to need less and less time to do the work it needs to do. Most of the time the bread is still very tasty and when you toast it, it is a wonderful treat even if maybe not that presentable. As we evolve as bakers I think we need to accept a flying crust here and there but there are things we can learn from each time and try to fix it.
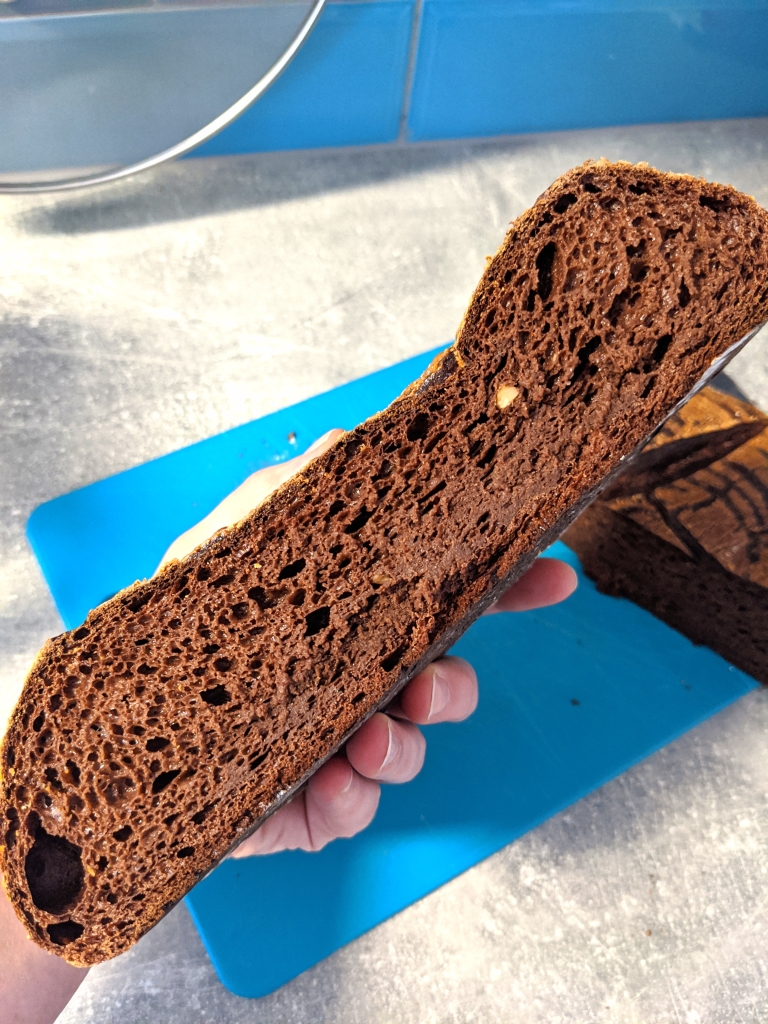
Gluten-Free chocolate and buckwheat sourdough -overproved 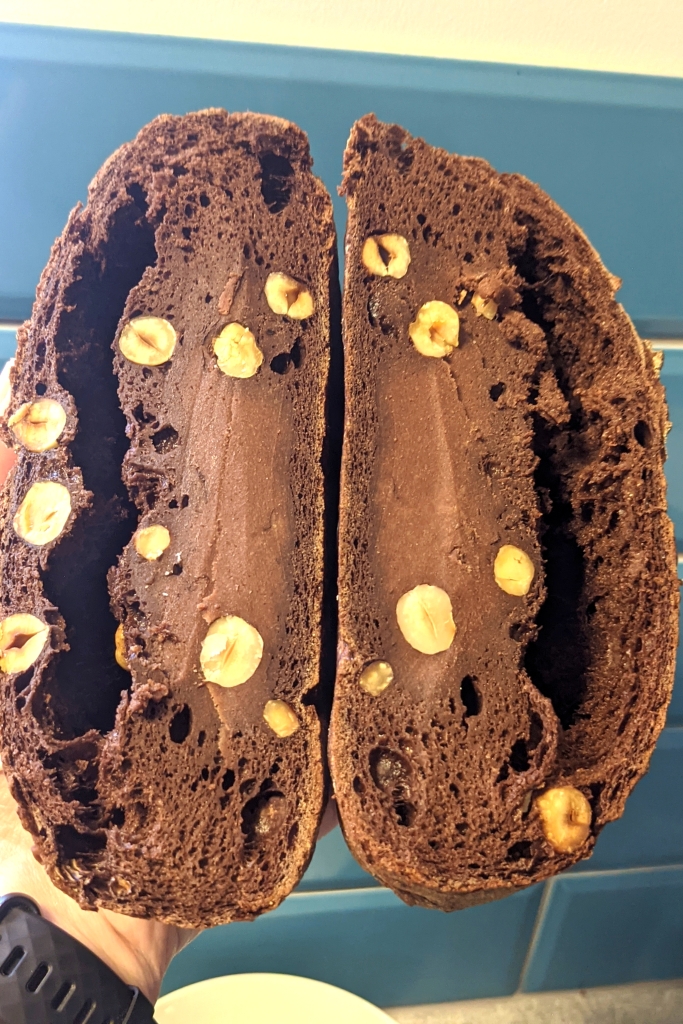
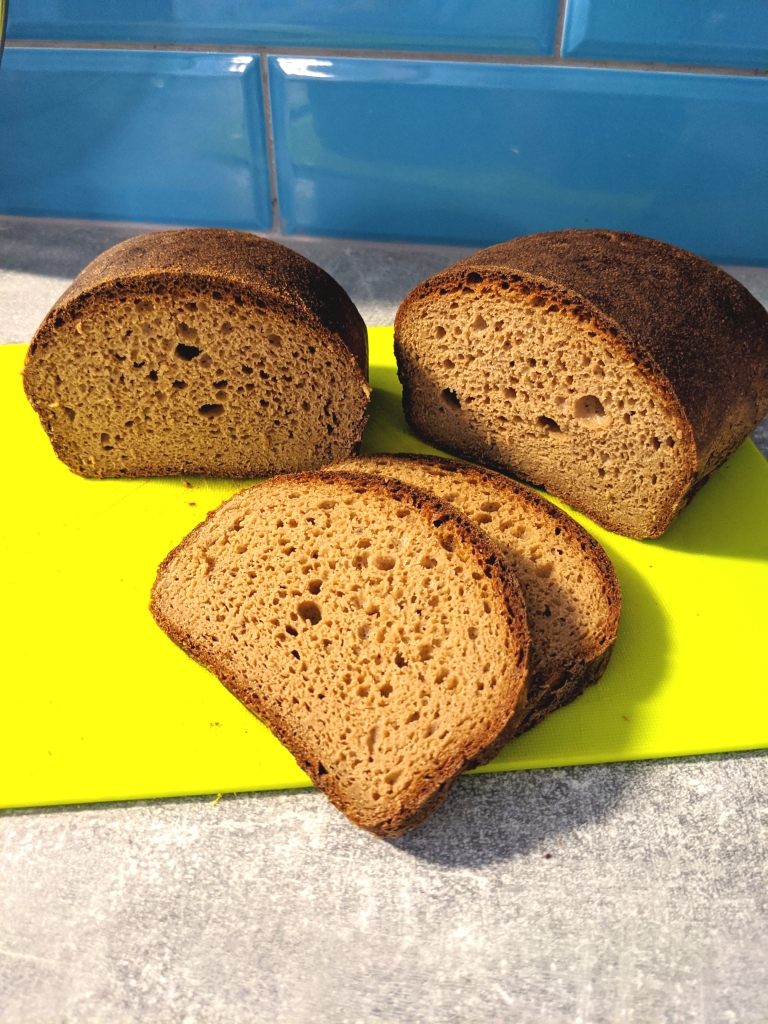
Gluten-Free chococolate and hazelnut sourdough – massively overproved
In regular baking the gluten, which anyone with coeliacs disease or gluten-intolerance can’t obviously have, offers a sturdy support and I think that is why I haven’t had overproving that much on my radar before having to go gluten-free. In gluten-free baking the support needs to be added in by using binders like psyllium husk, different gums (xanthan gum, guar gum etc.), egg white or flaxseed/chiaseed ‘egg’ as substitutes for that. In addition to the conditions of the prove (humidity, temperature), also the amount of different binders in the dough will affect how long the prove can be and it is a bit of trial and error based on the recipe and how your starter feels about it all. The good news is that with experience one learns to most of the time get things right. The breads I have made have both psyllium and egg whites of flaxseed in as binders which I think is needed to get high loaves with an airy crumb.
When your dough feels quite fluffy and is a bit mushroomed over the top, you have for sure gone over and the top tip I have learned on the gluten-free baking course and seen on Instagram is that you make a deep score (3/4-1inch) across the bread and that should prevent the crust detaching, you can also try to knock back the dough and reshape and bake after that, this I haven’t tried personally, though. The deep slash I have used a lot..
How long should I prove?
The correct proving time is something that one just can’t give a set time as so many things affect the length of the prove and only a rough guideline can be given, really. Room temperature and air humidity affect things a lot, so usually the more warm and more humid it is, the quicker the prove is. Also as your starter matures, if you bake with it regularly to keep it strong, you will find that it gets the job done quicker and quicker. I have had to reduce the amount of starter in the recipes to 125-150g to get a prove between 1.5-2 hours depending on the recipe. If I use more I will need to have my Dutch oven warming up before I even mix the dough so I can be sure that the oven is ready when my bread needs to go in. Others might however find that they struggle to prove theirs, so one has to go what with one has a bit.
Other things affecting the proving time is the hydration of the loaf (amount of water to dry ingredients), more ‘wet’ doughs proving quicker. Also starch content or adding sugar in any form (sugar, molasses, fruit juice, vegetables etc.) will reduce proving times as they are fast-food for the yeasts and bacteria in the starter. What I have only recently learned is that salt slows down proving, so if you reduce the amount of salt in the recipe, your proving time is shortened again.
When assessing the prove the recipe’s proving time can be used as a guide but be ready to accept that the loaf might prove in half the time. It is good to start checking the dough every 15-20min to get an idea on what is happening. Prodding the dough with a floured finger will help you assess the prove – when you press a shallow intendation to the bread, it should recover slowly in 20-30s. We want slightly puffed, not bloated. If there’s immediate bounce back, the dough is likely over and I would go with scoring deeply just to be on the safe side.
If a dough is high in starch or there’s nut flours used in the recipe or you have done a retarded prove in the fridge, the surface of the bread might stiffen making it trickier to asses and it is best to use the recipe as a guide and bake when you start to think “should I bake now or wait a bit”. I have noticed waiting a bit in general gets one into trouble! To me underproving is less annoying than going over.
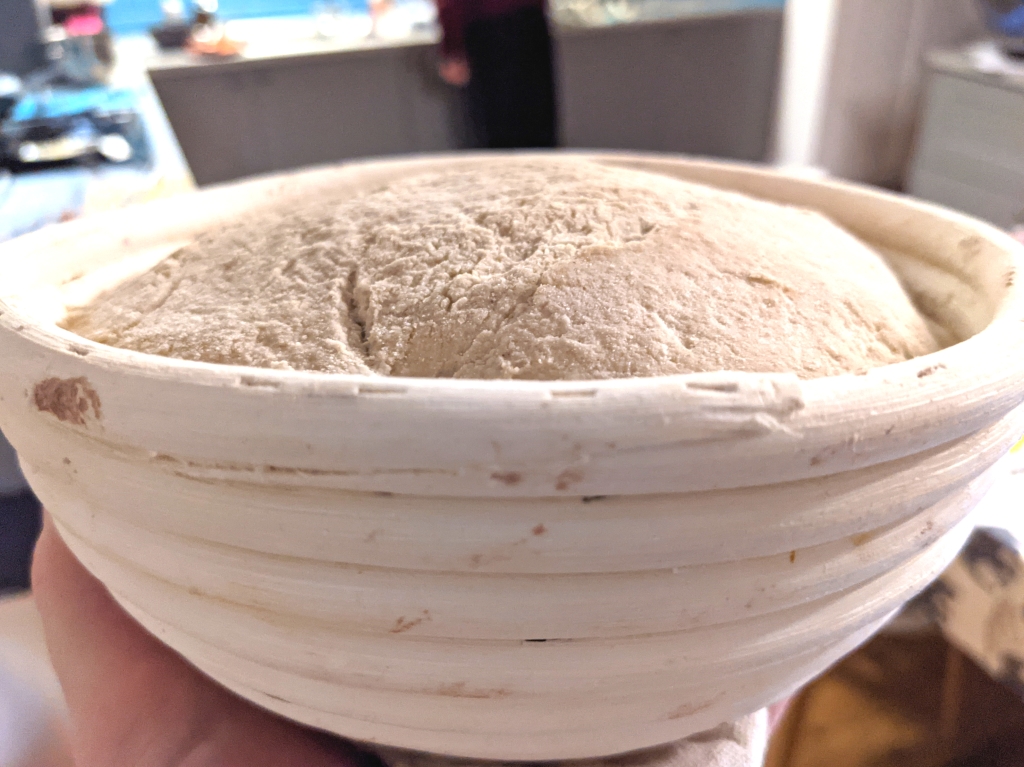
For GF dough a dome like this is too far. You want a bit puffed up, not ballooning. 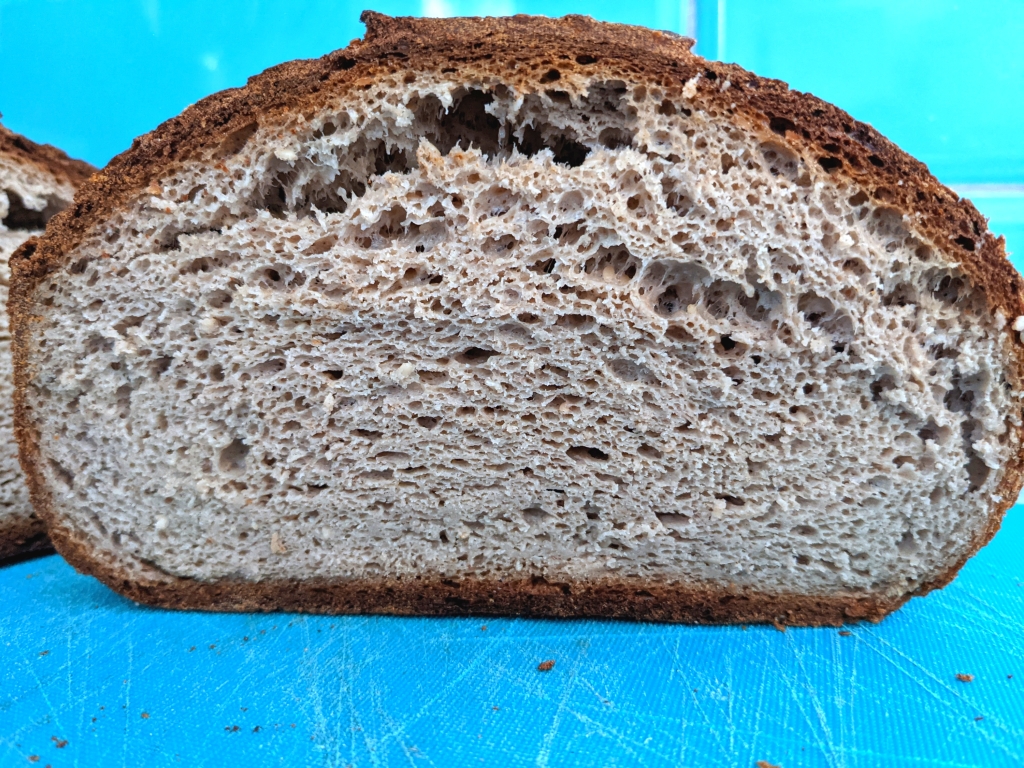
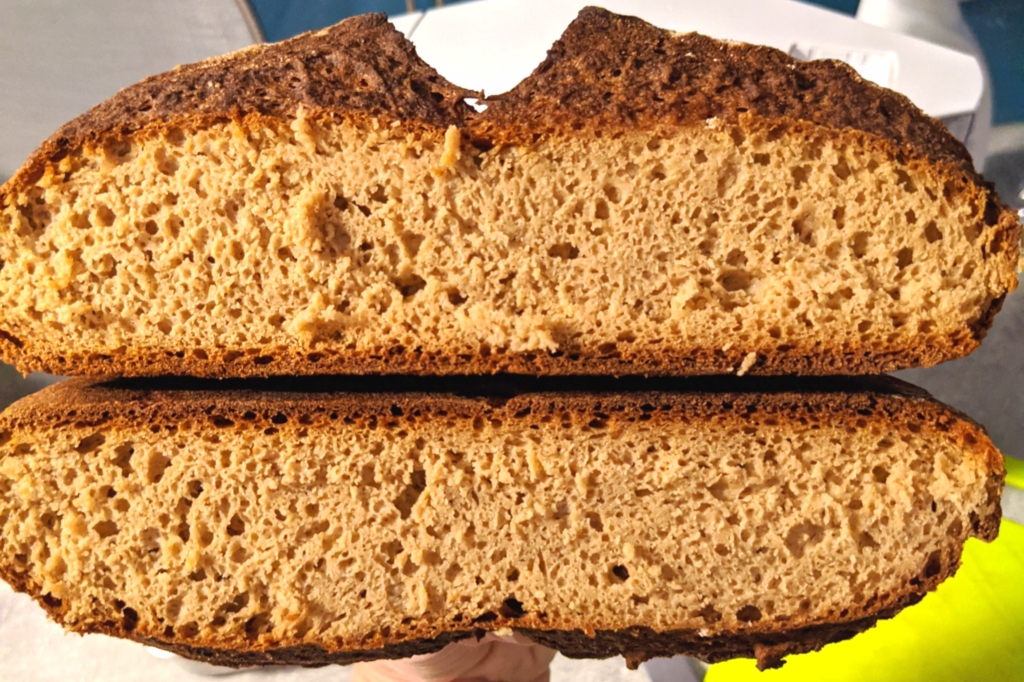
The crust hasn’t totally detached yet, 20-30min less would probably been perfect!
With my frisky starter I don’t use added heat, but if your starter is sluggish, proving function in an oven, using a dehydrator as a proving drawer or placing the bread on a rack over a tray of hot water which you then top up might help. If you are baking in the winter months or your house is quite cool, added warmth is likely to make proving times more manageable. Also if you find the conditions fluctuating in your house a lot, using something to help the prove along might help you standardise the conditions and make your proving less unpredictable.
I know there are gluten-free sourdough bakers that manage proves equating to regular sourdough, but my personal experience is that the proving times are a lot shorter. If you want more sour flavour in your breads, retarding the bread in the fridge with small amounts of starter (100g or lower) are your best bet.
Why is my bread gummy inside?
I have come across comments that homebaked gluten-free bread being gummy is a feature that you can’t escape. Psyllium husk powder is often blamed for this but so far I haven’t found that to be the case. As far as I have experience, the gummy insides are either a case of overproving or too short a bake and/or too low temperature. Gluten-free flours absorb more liquid and hence there is more water that needs to be removed from the bread when baking. Also the bread needs to be cooled to room temperature before cutting to allow the liquified starches recrystallise so that the bread doesn’t stick into the knife.
If you feel your bread is sticky, try extending the bake for 15-20min at the end. If you are afraid that the bread will get too dark and bitter (which I haven’t found to be the case, I feel especially buckwheat and teff take on a lot of colour and still don’t taste bitter), you can lower the oven temperature with around 20C so that the bread is gently dried. If you have time to do this, you might also leave the bread on the rack in the oven to cool along with the oven with the oven door propped ajar. Even if on the table, cool the bread on a rack so that the moisture can also leave from the bottom of the loaf and not get trapped under.
Gluten-free recipes typically have adjustions for the bake to be just right. What you might find is that if the recipe is adapted from a regular recipe, the needed adjustments haven’t necessarily been made to fit GF ingredients and the end results might be varied. If you find you need to amend the baking, a good strategy might be to bake at the starting temperature of the recipe for 1/3 or half the time based on how dark the end result is turning out and then lower the temperature for the rest of the bake and bake for longer. I haven’t yet found a bread that would dry out unedible due to a longer bake, you will get a thicker crust, though. It is also a good idea to invest in an (inexpensive) oven thermometer for even new ovens might give you a different temperature than it claims on the display.
Using ice in a dutch oven, or a bowl of water at the bottom of the oven when baking in a tin or on a baking tray/steel should help thin out the crust. Personally I like to use a Dutch oven for baking bread (a large iron pot with lots of heat storing capacity in). The pot provides intensive heat at the start of the bake giving rise to the bread and especially if you use ice to give steam, there is a very specific environment for the bread to bake in. If you don’t have a Dutch oven, baking in a tin still works well, especially if you have a method to drive more heat into the bottom of the bread by using for example a baking stone under the tin. Do make sure the stone or Dutch oven is hot when you put the bread in, to get the benefit from it.

Now that I have baked gluten-free bread at least once a week for 9 months, I can’t think a nicer “hobby out of necessity”. As the starter is a symbiotic system of living things, you never quite know how it is going to act on the day with the ingredients it’s given and it’s always a bit of a surprise to see what you get. I really love to bake in the evening and leave the loaf to cool overnight so that I can cut into it to see how it turned out in the morning. Some days one might feel frustrated on what caused the bread not to turn out the way one hoped for and then find that there’s still joy in learning. I have also made friends online over the common passion of GF sourdough, which has been really lovely!
It is a great idea to document the progress in pictures, as we tend to remember the failures more easily than the successes. I was delighted to compare my first loaf from June to the one I made last week with the same recipe and see that I have actually progressed quite a lot. I also mill my own flours now, more on that on another post, I think!
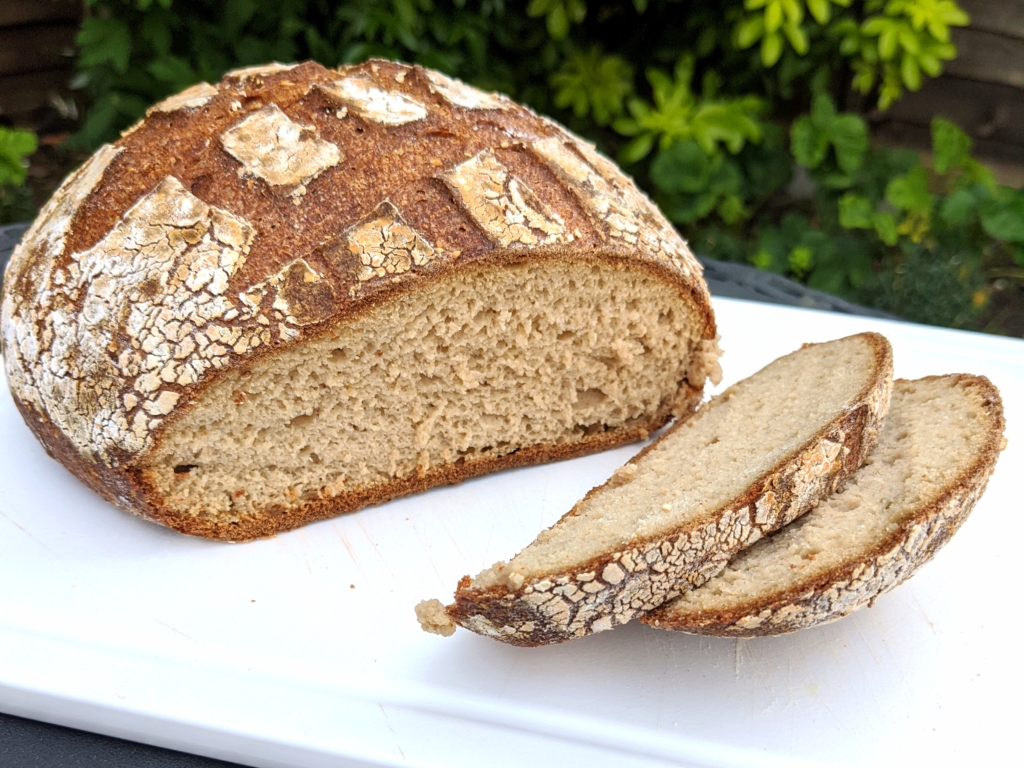
My first ever gf sourdough boule in July 2020 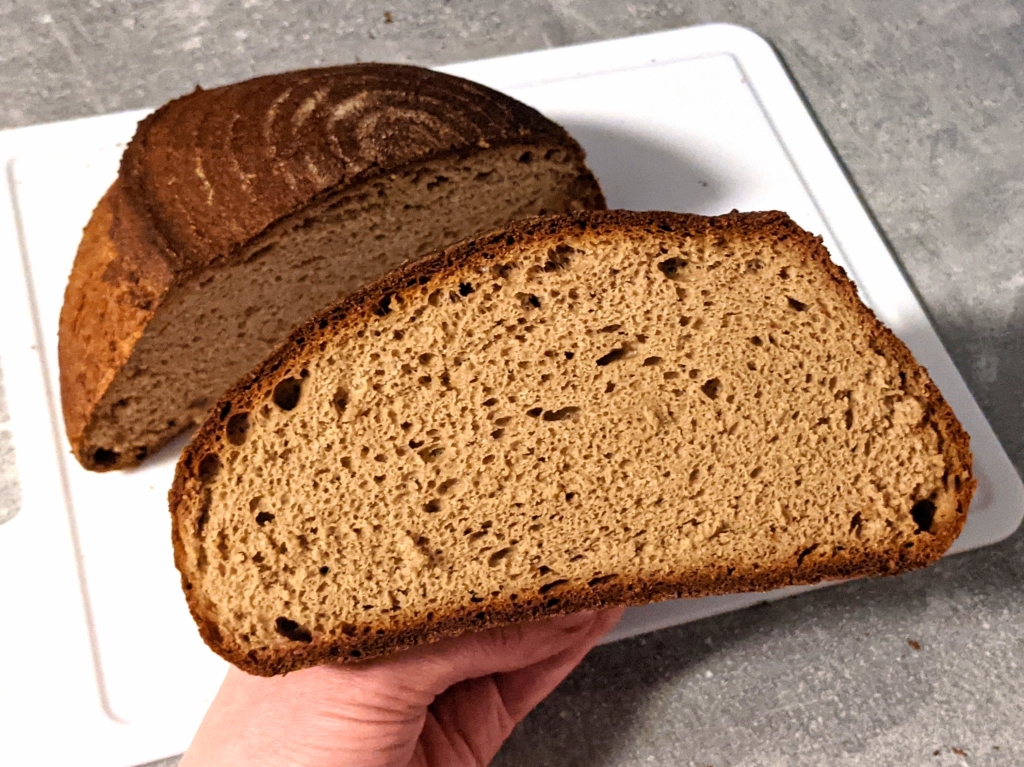
The same recipe with some molasses in, with self-milled flours in March 2021
Do comment if you have any questions on the baking aspects of things, I will try to answer to the best of my ability and I can write more detailed posts when required. I would love to hear if you are baking GF sourdough or thinking about it, too! If you have really pressing issues or you want to see more of my day to day bakes and cooks, come follow me on Instagram @gf_lifetweaks and send me a DM!
