
I wanted to have a go of making something from gluten-free gingerbread dough for Christmas to bring a bit of Christmas cheer. Having experience of gingerbread houses collapsing I thought a lantern we used to make in my childhood would be safer for it doesn’t have the weight of the roof to withstand.
I am quite pleased that I got a finished lantern and it’s still in one piece as I’m writing this so I want to share how I made this if you want to make one yourself. Even if you don’t make this for Christmas day, you can make one during the winter holidays if you find more time on your hands. Decorating gingerbread is so much fun!
Making the gingerbread dough
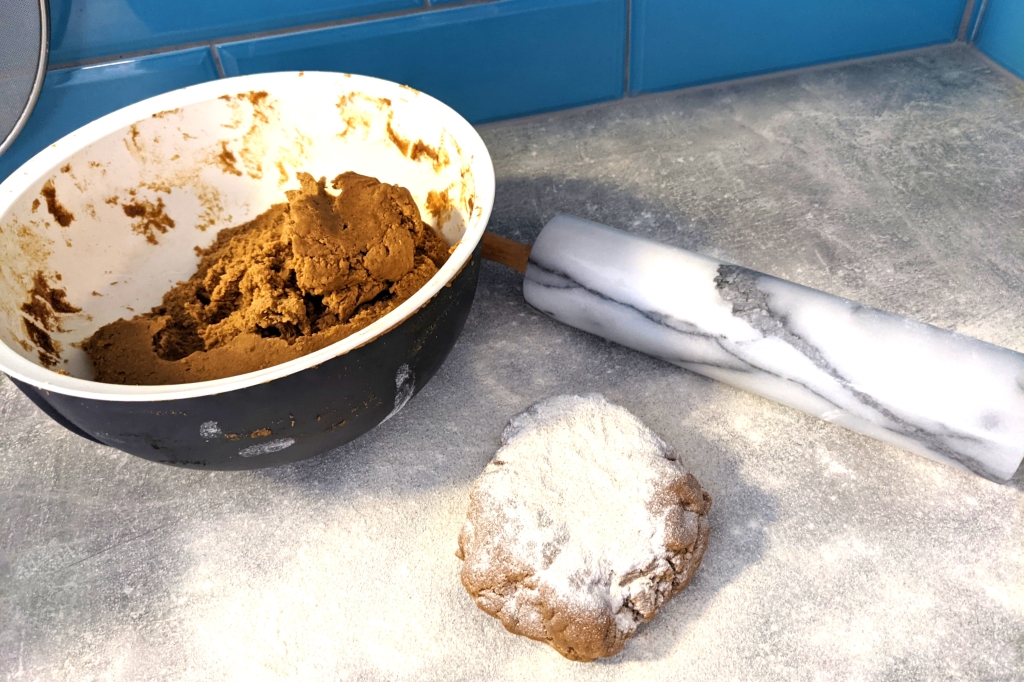
I used the easy Nordic-style gluten-free gingerbread dough I posted a little while back to make the lantern. The syrup gingerbread is quite sturdy when you bake it for longer so I knew I’d have a good chance to succeed. When making the dough to build something from you need the dough to be quite firm so that it doesn’t spread much when baking. The amount of flour you use depends a lot on the gf flour mix you are using but I’d add 11-12dl of flour with 2tbsp of psyllium husk powder mixed in to start with.
After the dough has rested the minimum 3 hours in the fridge, see if you can roll the dough without it sticking much and if you can easily cut shapes from it and lift them to a tray. If the dough feels soft and unmanageable, knead a few tbsp of flour in at a time to see when the dough firms up so that it’s easy to handle. Leave a slight softness, for you add more flour when rolling the dough out, and too much flour starts to make the dough crack when rolling and baking.
Lantern pattern
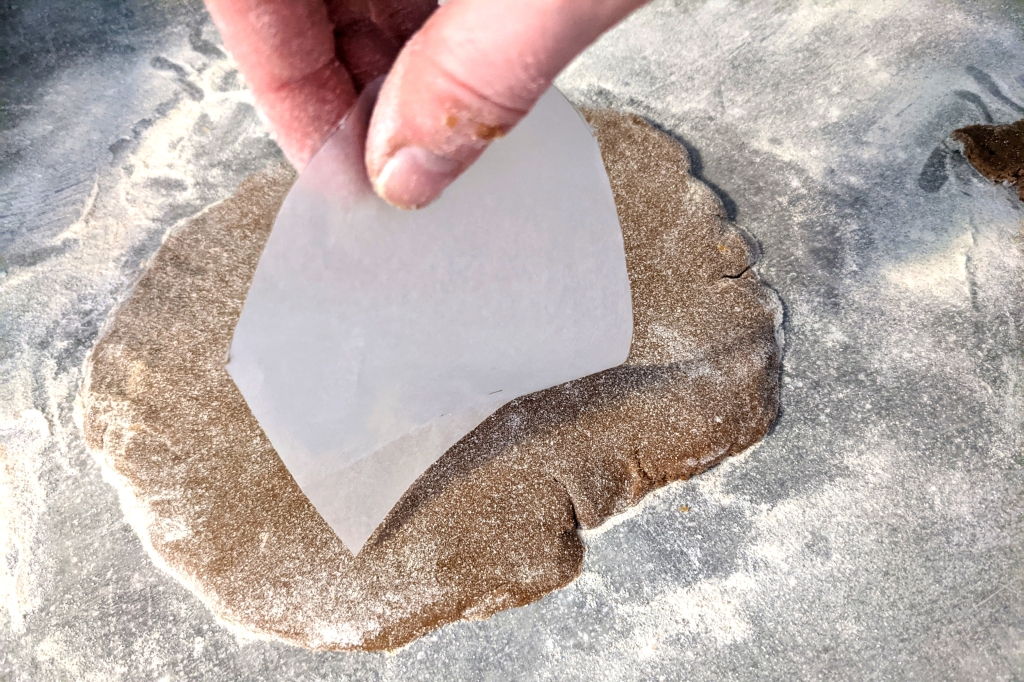
I made the lantern a very basic shape, since I wasn’t really sure how the gf dough would bake and how sturdy it would really be. I drew a shape on baking parchment where there’s a semicircle on a 10cm X 10cm square. I used a large glass tankard to help me draw the semicircle. I found this size of a lantern small enough to hold together on my own and it was large enough to safely hold a tea light without it getting too close to the edges, but if you use battery tea lights instead of real ones, they are safer and you can make smaller lanterns that are even easier to hold together when assembling.

Do bare in mind that if you use cookie cutters to make the windows on the lantern that there’s at least a 15-20mm edge left to the sides, then the biscuit should stay sturdy enough to handle and won’t break so easily during the build.
Rolling, cutting and baking
When rolling your dough, use a generous dusting of gf flour on your worktop and on top of the dough. If you have a large spatula, it will help moving the base to a baking tray.
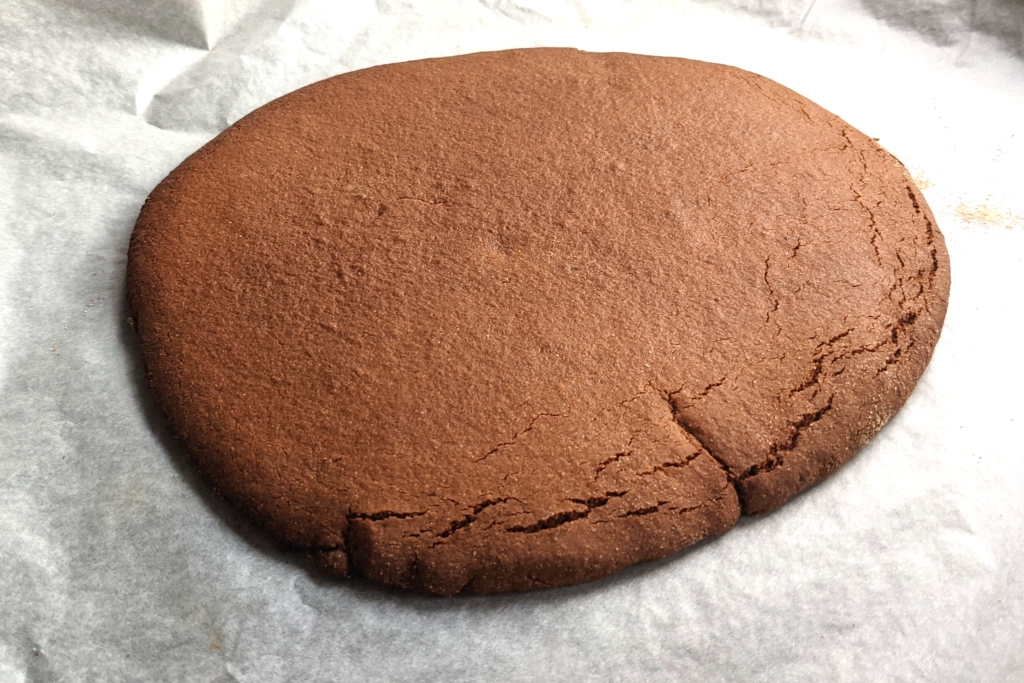
First make your base plate. The lantern is 10cm x 10 cm so check that it fits on your base and that you have a dish or tray where the base plate fits. If you end up having a base that doesn’t fit on a tray or a plate, of course you can cut out a piece from a cardboard box and cover that in tin foil to make a display tray for your creation.
Roll the base around 8-10mm thick, you want it to be quite sturdy. Roll the dough as evenly as possible to help an uniform bake and give a nice flat surface for your piece. If you want, you can cut the base out or leave unfinished more rustic edges. Using a spatula, lift to a baking tray lined with non-stick parchment paper.
When baking the base use 200C/185C (fan assisted oven). The baking time depends a lot on the size and thickness of the base, mine took 25minutes. I started from 15min and added 5min, then 2-3min at a time until I got a no ice dark bake that felt rather solid but didn’t burn from the edges. The gingerbread solidifies as it cools, so don’t wait it to feel totally hard, dark brown colour without catching the edges is what you want.
Roll out more dough to cut out the pieces for the lantern. Ideally you want to roll out enough dough to cut all the pieces from the same sheet so that they are of uniform thickness and quality. If you can’t get all the pieces from the one sheet, just roll out more and preferably measure that you have the same 5mm thickness in all the pieces.
Place the pattern on the rolled dough and cut pieces out with a sharp knife. Preferably prepare spares in case something brakes or burns… I made everything double just in case and then I could choose the best pieces.
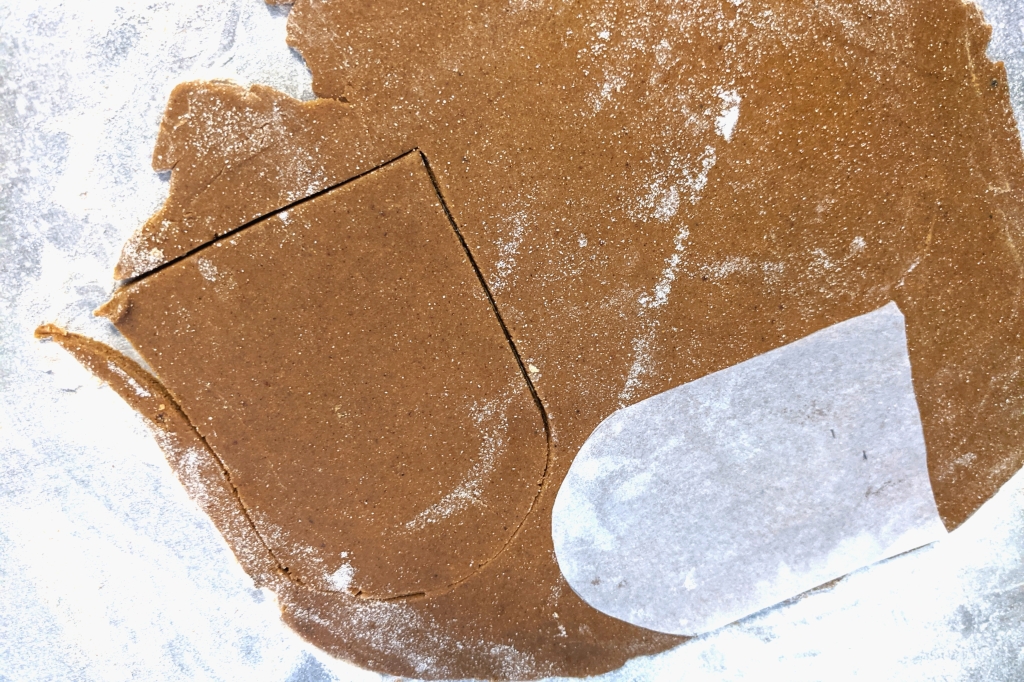
When you have cut the pieces, move them to a baking tray lined with non-stick baking paper using a spatula. Cut out the windows when on the tray, I found this easier than to move a piece with a hole in. You can use cookie cutters or cut out the shape you want. Just make sure to leave an edge of 1.5-2.0cm so that the pieces are sturdy enough to assemble.
Any excess dough left you can roll out and cut out gingerbread shapes and bake a couple of trays of gingerbread so nothing is wasted.

When baking the lantern pieces again go for a nice rather dark brown bake so that the gingerbread is quite hard when it cools down so that you can build with it. Mine took around 12min but keep checking every few minutes.

When the pieces are done, let them cool down properly until decorating the pieces or assembling.
Decorating and assembly
I like to decorate the sides of the lantern first before assembling because I feel it’s easier to decorate pieces that lay flat. You do need to wait until the icing has fully set before assembly and be mindful that you don’t damage the decorations when assembling
I like to use royal icing for decorating for it sets quicker than icing made with icing sugar and water. You also tend to get better control of the thickness of the icing. Royal icing is egg whites and icing sugar whisked together. I used one egg white which I whisked lightly with a fork and then kept adding tablespoonfuls of icing sugar until I got quite a thick icing that would be ok to pipe and wasn’t runny. If you are worried about food safety of raw egg, use pasteurised egg white which should be quite readily available in supermarkets.
If you want to use shop bought icing, do checked that they are ok for coeliacs so do not contain wheat, barley, rye, oats of have a ‘may contain’ statement to any of them or ‘cereals’ containing gluten’. I had a look in my local supermarket, and from their designer icings the white one was ok and all the coloured ones had wheat in. For a coeliac even a trace amount can trigger the auto-immune response and damage the lining in the small intestine undoing up to 6 months worth of healing, as that’s considered the minimum time the lining takes to heal, so it’s better to be safe than sorry.
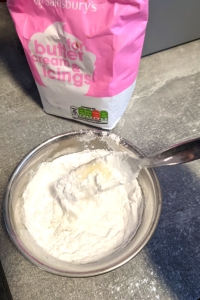
You can make royal icing from egg whites and icing sugar, add the sugar into the lightly whisked egg white until you get the wanted consistency 
You can make a small piping bag from a plastic bag by inserting a piping nozzle through and securing with a piece of masking tape.
With the decoration, you can go as minimal or as elaborate you like. If you want to use sprinkles and other decorations such as sweets, again make sure they are ok for coeliacs to use as that’s the tightest standard for gluten-free. Finding suitable decorations can be tricky sometimes at least in the UK, but the selection in supermarkets is improving. I found the golden stars and snow flakes from Sainsbury’s to be ok as well as the shimmering decorative sugars. From sweets Skittles and Haribo are typically ok, of course just to be safe, always check everything in case there’s been changes to ingredients or processing.

When your decorations are done and the icing set, you can assemble the lantern. I used the royal icing for this. You could use melted sugar to which you dip the edges and then join together. It would be the quickest one to set and a really solid way of fastening the pieces, but I find the hot sugar a bit too tricky to work with so I prefer to work with royal icing, even if it means staying still for a longer time holding the pieces together until they’ve set.
To assemble, pipe icing along all the straight edges of the lantern pieces and then join them together carefully one by one holding them together with your hands. Having someone help you with this makes things a lot easier but it can also be done as a one person job. You might want to put an audio book on or have a video to watch while you hold the pieces and wait for the icing to set for this might take nearly ten minutes. Or you can take it as a meditative practice and do breathing exercises while you wait…
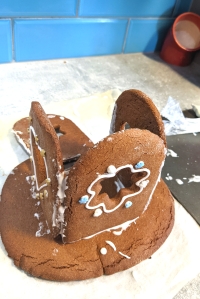
Have patience with the assembly and remember to hold the pieces together until the icing has set firm enough to hold. 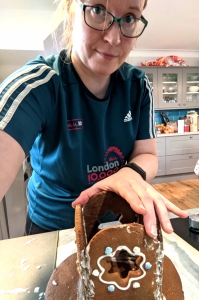
It’s good if the lantern you make is small enough to hold with one hand, especially if you make one on your own.
When you are confident that the pieces are holding together, you can let go and let the icing dry out for 10-15min. After this you can tidy the lantern up and pipe icing on the corners and bottom of lantern to fill any gaps and make it more attractive. You can add again any gf decorations to get the finish you want. Making squiggles on the base with the icing and adding sweets or sprinkles is a good tactic that doesn’t require a steady hand but you can
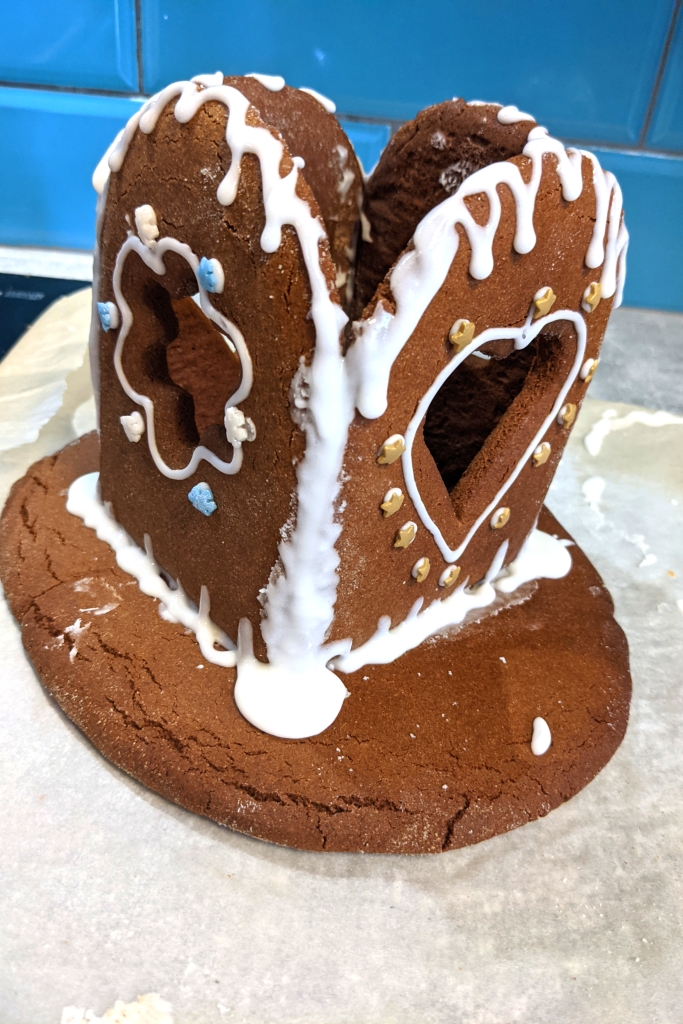
Now your lantern is done! Wait for the icing to dry out before moving to a display tray. You can place a battery operated tea light inside to make it more festive. If you choose to use a real tea light, place it on a hard non-flammable surface underneath as per candle manufacturers instructions, I used a soy sauce dish. Also make sure the candle doesn’t get so close to the sides that they could start to burn. Stick to fire safety guidance and never leave a lit candle unattended, also keep away from children and pets. With an edible table decoration, children and animals might need to be kept an eye on even without a candle, to be fair.

When you make a lantern of your own or do a bake with my recipes, do let me know by commenting here and letting me know where I can see a picture or tag me on Instagram (@gf_lifetweaks). You can also come and share your creations on my Facebook (@gflifetweaks) by leaving a comment or sending a DM. I’d love to see how you get on and how you are finding the recipes. Hope you have a fun time making these, have a happy festive season!

Niin söpö!
LikeLike
Kiitos! (Thanks, I think it’s quite cute, too)
LikeLike