
Over the past few weeks I’ve achieved a goal I set myself about a year ago. That was learning to bake gluten-free sourdough bread – the gorgeous types one sees on Instagram. I learned my new skill via Naomi Devlin’s online course, so I’m not at liberty to share the recipes I’ve used. Instead, I want to share how I have gone about the baking so that you might be inspired to try it. For me making my own breads, crumpets, waffles etc. without shop bought gf flour mixes has totally changed my world!
Take time to prepare
Making a sourdough starter is sort of like getting a pet, you need to think ahead to have everything it needs at hand and reserve time for getting to know the newcomer. Making sourdough isn’t complicated but you need to take a bit of time to do your homework and start after that.
I had bought Naomi Devlin’s cookbooks but life tended to fill all the gaps and I didn’t seem to get around baking things. Hence I enlisted for her Baking day in London but of course Covid19 got in the way and the course couldn’t happen. Luckily Naomi pivoted to online courses, so I got that one instead. I think that the online course is great since there’s quite a lot to take in and it’s lovely to have the materials to revisit. There’s also a helpful Facebook group to share the love for baking and ask questions from Naomi or fellow bakers.
I do recommend Naomi’s course for I feel the information is clear, the videos help a lot in learning what things should look like. Also, instead of just learninh to make bread you also learn other things. Also one comes to understand the properties of different flours and the behaviour of the sourdough. The results I have gotten with the recipes are phenomenal and both my choice in foods and the quality has skyrocketed and I find the course totally worth the investment. I am not affiliated with Naomi, just really impressed with her course and resonate with her food philosophy.
You can learn to make gluten-free bread without a course for there are books and also plenty of recipes and videos on how to make gluten-free sourdough starter and breads online. There are different styles of baking and so many ingredients to choose from that this might feel slightly overwhelming but it’s best to try one that suits your tastes, ingredients available etc. best and just give it a go.
Get organised
There is some equipment one should have to bake gf sourdough like gf sieve, a large glass or ceramic bowl (plastic might be alright but somehow sourdough doesn’t like steel, I’ve been told) and some larger glass jars to store the starter and discard. My proving basket is still on its way from online shopping but a colander lined with muslin which I flour with tapioca starch has worked well as a substitute. Baking boules in a Dutch oven produce lovely crispy crusts and improve oven-spring (how the bread rises when baked), so investing in one is a great idea but baking in a loaf tin is still an option if you don’t want to buy one when getting started. I have a large cast iron pot we got as a wedding gift that finally has a job and I’m delighted for that. Depending on what you want to make with the sourdough other pieces of equipment might be needed but you don’t necessarily need it all to get started.
Because sourdough starter needs regular feeding to keep it healthy and working, one has to have a reserve of flours for feeding and also to bake with the starter. With the pandemic about, sourcing gluten-free (as well as regular) ingredients has been even trickier than normal but online shops have come through brilliantly even in the middle of this all. I decided to order a larger batch of flours so I have enough to feed my starter and bake from it for a longer time and also make other things than sourdough.
It makes sense to have a look at what type of flour mix you are going to use and also what other flours and ingredients you need for the recipes before ordering online to avoid extra postages or having to scavenge for missing things last minute from the shops which might not even be possible. My starter mix is millet, quinoa and buckwheat, for I avoid corn and rice as much as I can due to intolerances to them. In addition to the flours you use for starter mix, you’ll probably need psyllium husk powder, I’m sure most gf bread recipes have this. Depending on the recipes you might need things like potato and tapioca starches, ground almonds, cocoa powder, linseed and of course some cupboard staples.

To avoid missing any necessary items, go through all the materials you have at hand so that you understand what you are doing and why so that everything runs smoothly when you start. There are helpful Facebook groups for everything so if you are not taking a course with its own group find a friendly one on gf sourdough or gf baking to help you out. You can also comment in this post so I can see if I can help.
Start with the starter
Sourdough is made by using naturally occurring yeasts and bacteria cultivated for the purpose to raise the dough instead of using one type of yeast to bake with as we do with shopbought yeast. This mixture will give a more complex, earthier, flavour and sourdough products are thought to be easier to digest for the yeasts and bacteria have already done part of the job for you.
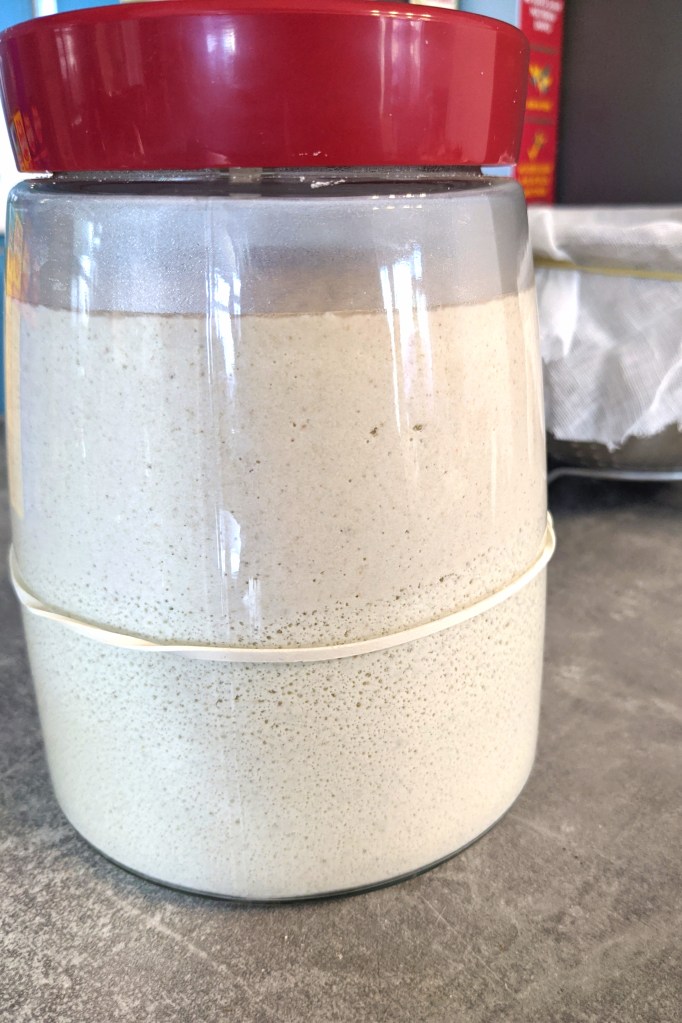
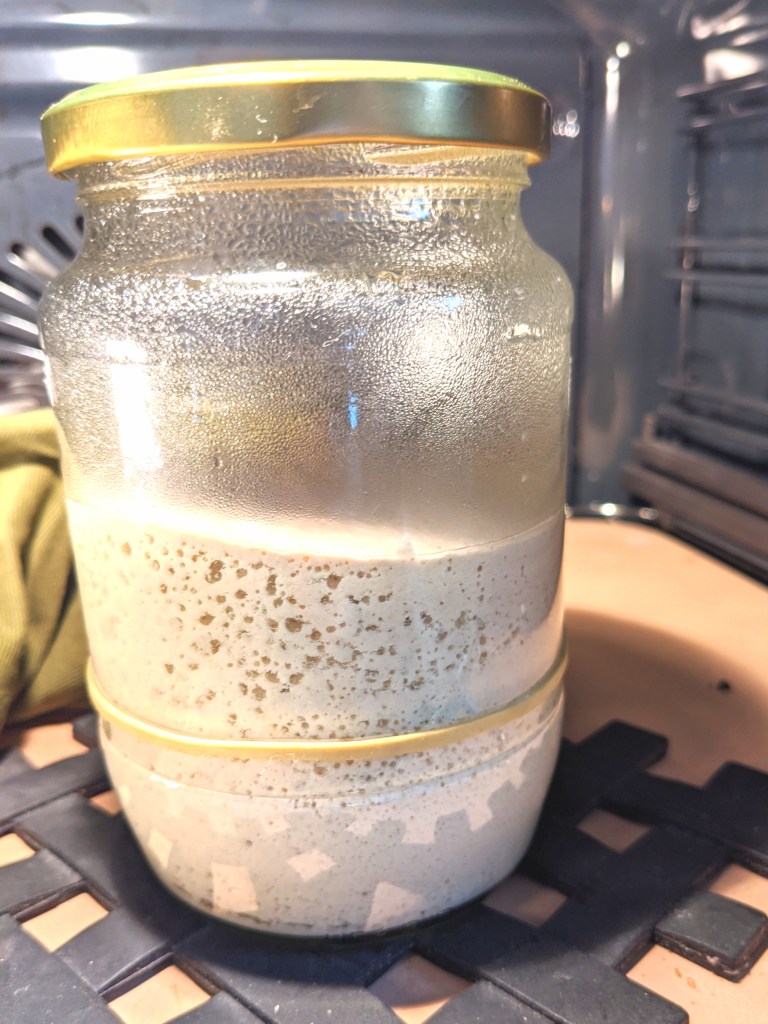
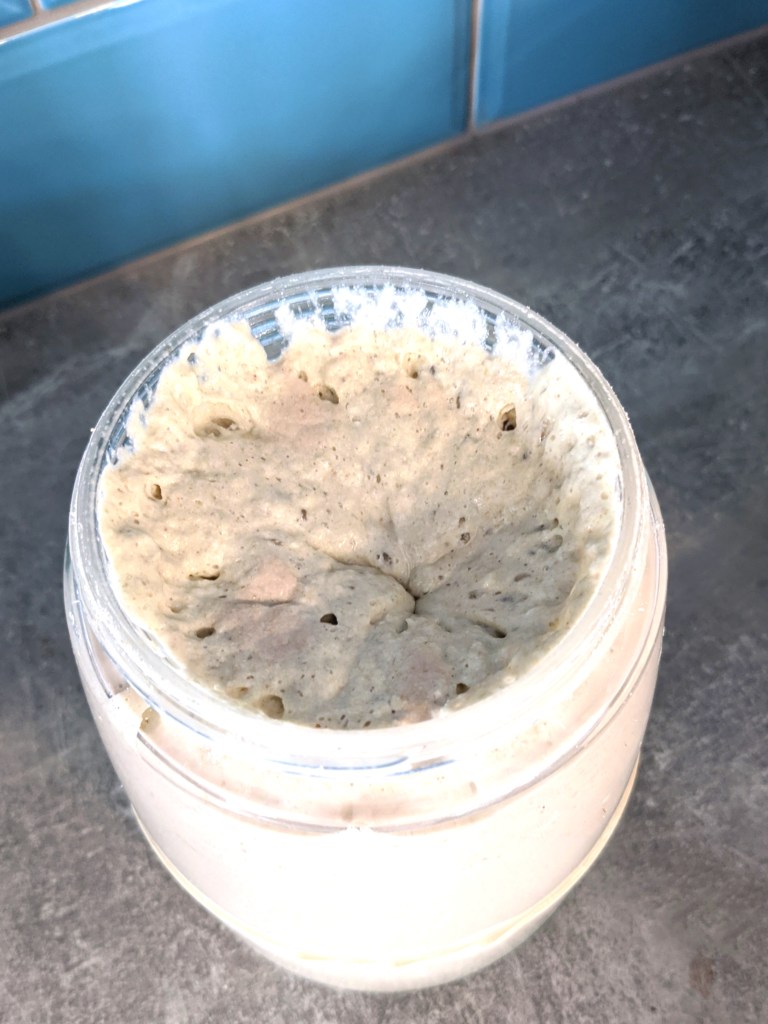
You can make your own starter basically by mixing water and flour and leaving it to room temperature and see what types of things turn up. This is a simplification and you’ll get exact instructions in the recipe you follow but the idea is the same – water and flour in room temperature, feeding with fresh flour and water regularly until you get a nice fresh smelling bubbly starter. Controlling the conditions – temperature and acidity of the starter – will determine what you grow in the starter affecting it’s flavour and performance so follow the recipe and instructions quite carefully.
Getting a starter baking ready from scratch takes about a week minimum. If you feel you haven’t got the patience or courage (or other food intolerances as motivation) you can also buy a gluten-free starter baking ready online.
And bake!
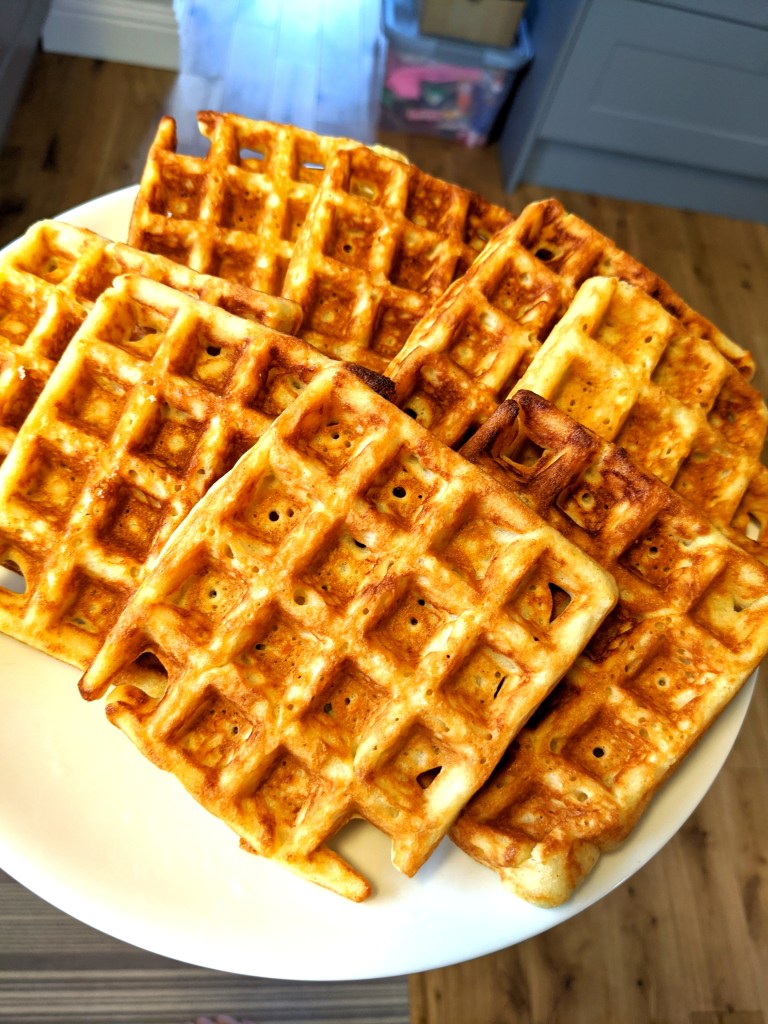
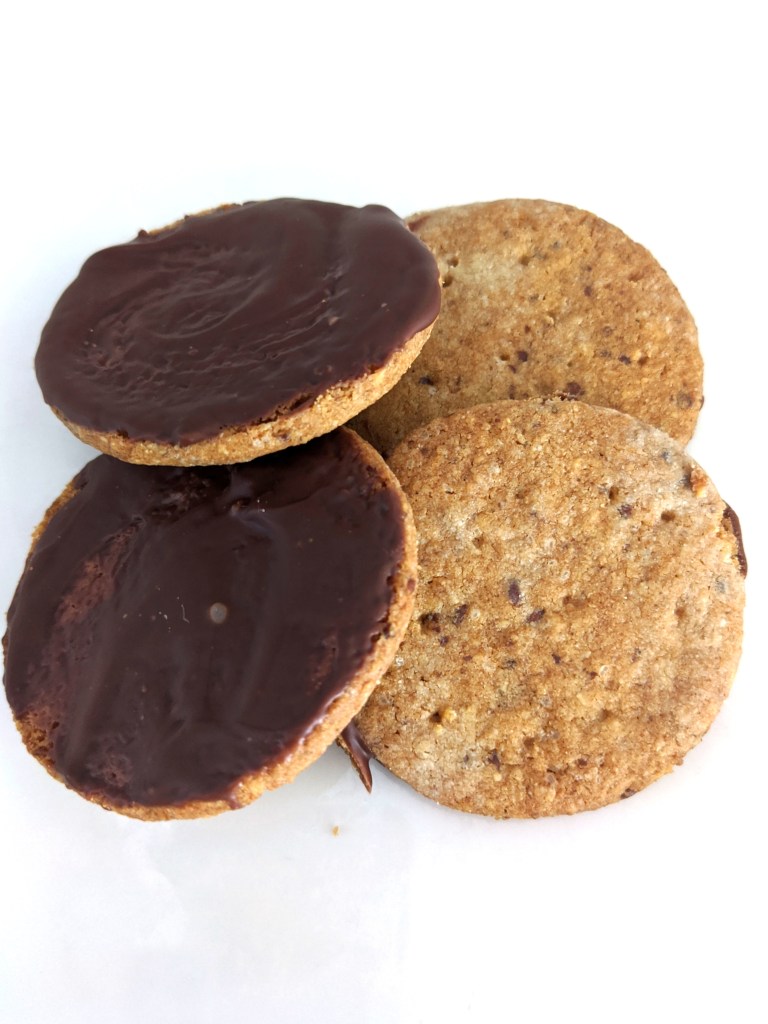
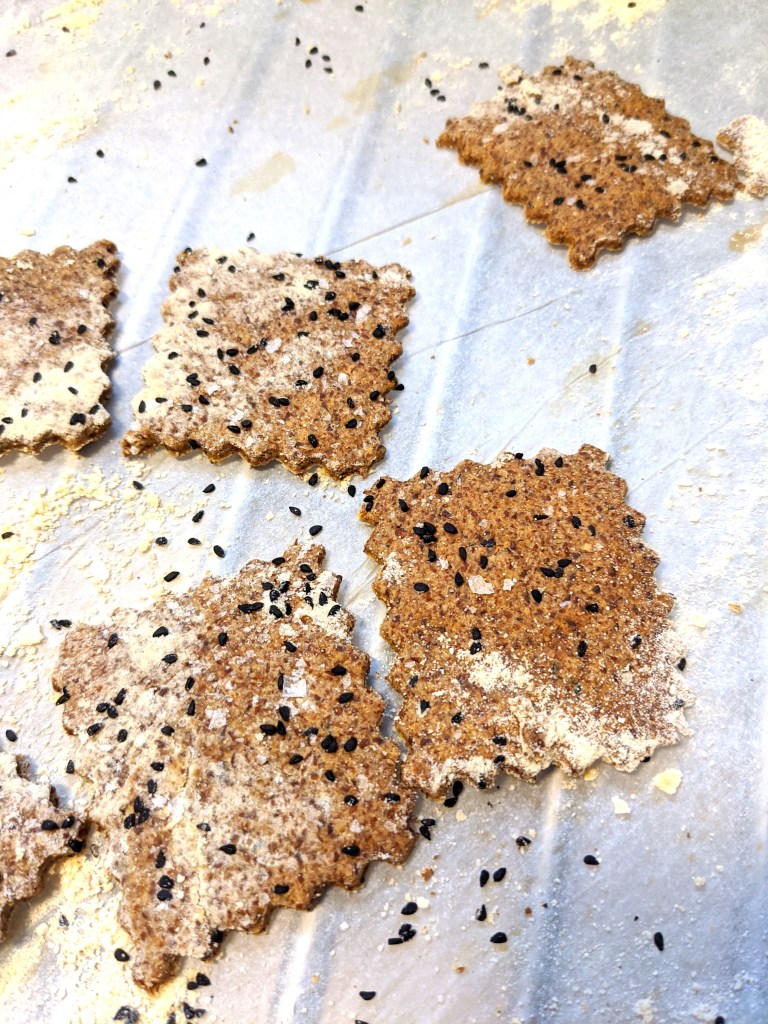
You can already make some things from the sourdough discard like crumpets, digestive bisquits and crackers when you are nurturing your starter to get strong enough to bake breads with, so you don’t have to wait a week to make something. When your starter is bubbling away happily and doubling up in size (or more) after feeding, you are ready to bake your first bread!
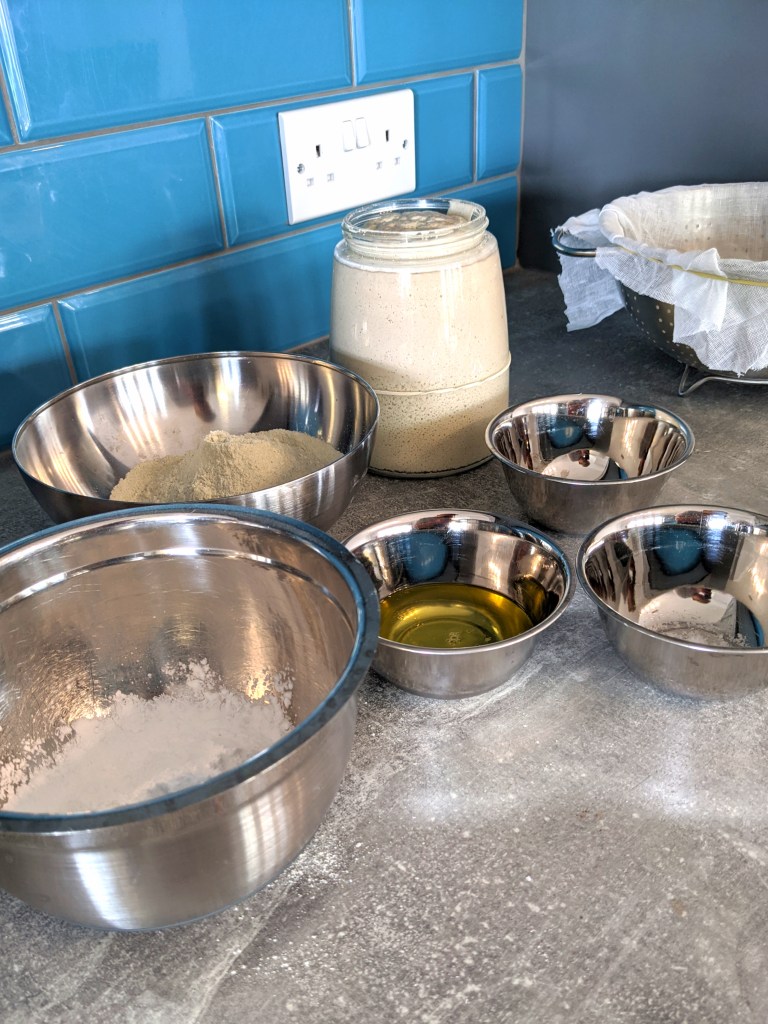
Make sure you have read the recipe and what is needed before hand for you do need time with sourdough. It is likely that you will need at least half a day to get from feeding the starter to making the bread, proving and baking the bread. Also you need to give the bread at least 2-3 hours to cool down so that it isn’t gummy inside before cutting it, so you need to consider your timings in advance for when you actually want to get to the eating bit. The recipe you use will give you instructions and in Naomi’s course she gave different options to work baking into your schedules. I now tend to feed my starter the night before baking so that it’s ready first thing in the morning but if you want to speed things up you can use warmth to get the starter baking ready in a few hours for some ‘in the spur of the moment’ baking or ad hoc waffles.
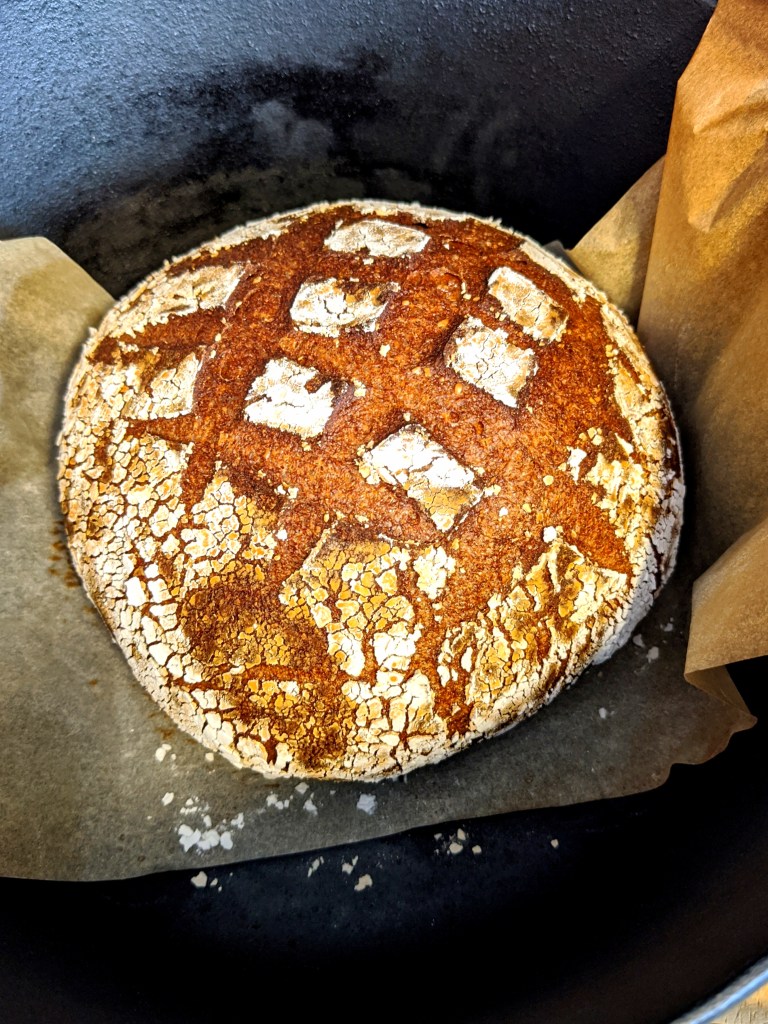
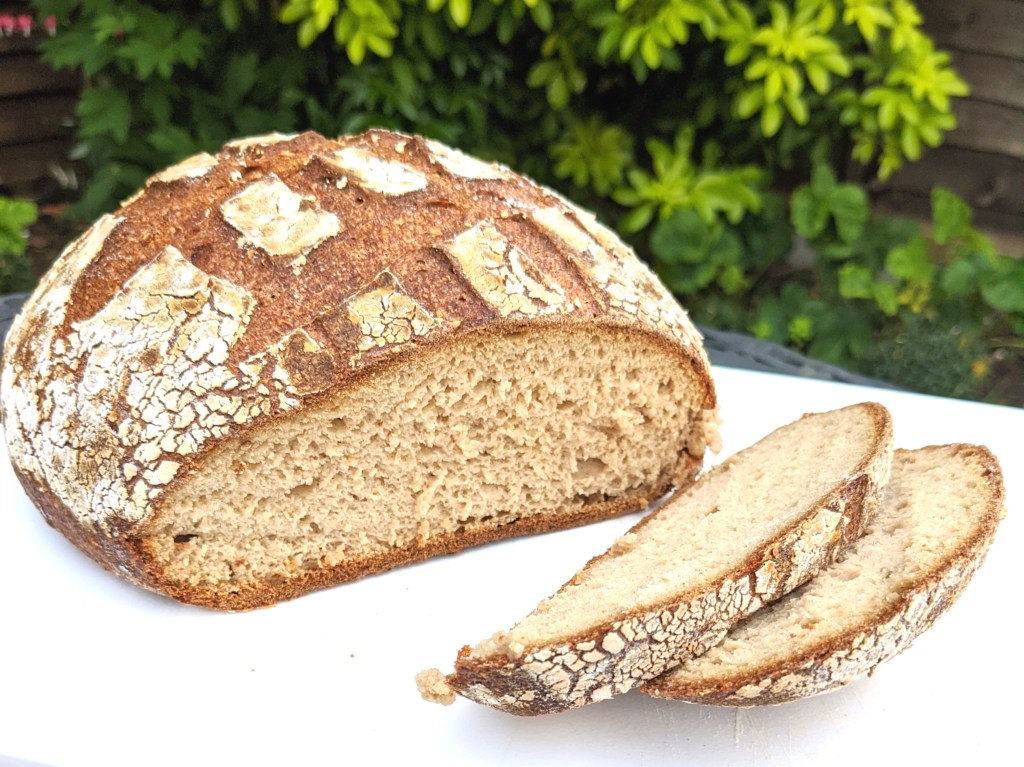
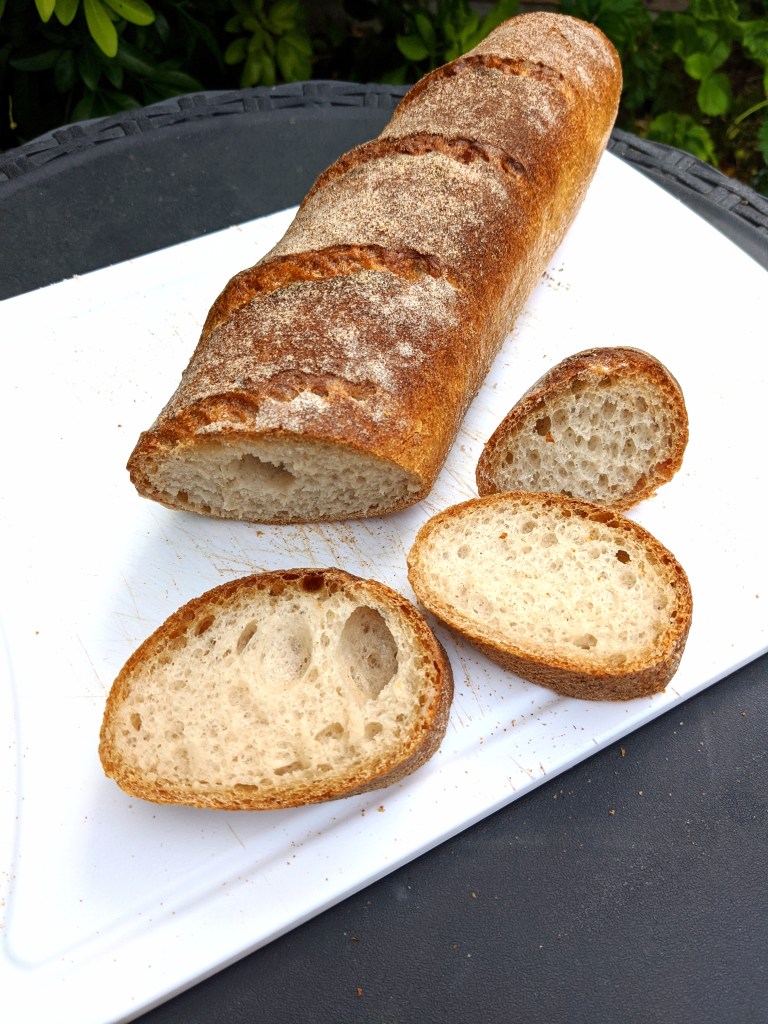
As with anything new, follow the recipe and instructions carefully and you’ll get the best results. The more you bake the better you will understand what you are looking for. I found with the instructions, videos and recipes of the course that baking was a lot more easier and straightforward than I thought and I was delighted of how my first gluten-free sourdough boule turned out. The crust was crispy, the crumb was soft and not too much holes. The bread held together great when cutting, something that’s not to be taken for granted with gluten-free breads.
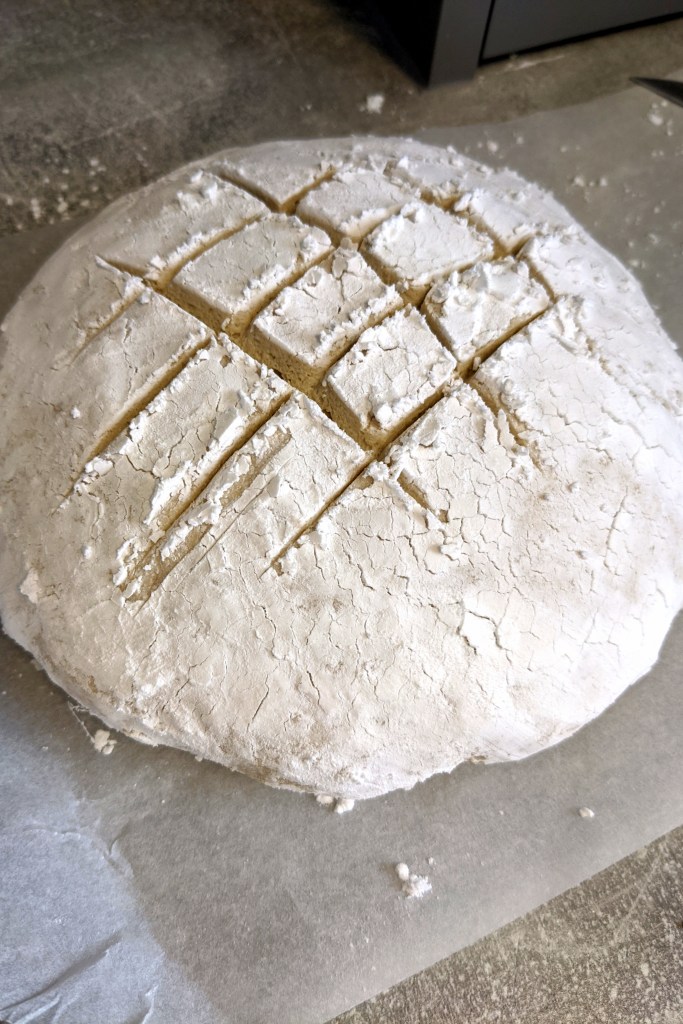
I was delighted on how easy a basic boule using the starter mix as the main flour mix is. The dough was quite easy to mix and form and then pop it into the proving basket for the three hours it took to prove.

If you are using a Dutch oven, make sure you have it piping hot at the time when the bread is ready to bake. Getting the correct prove might need a little practice so don’t be disheartned if at first your bread deflates when cooling or is a bit too dense. You will get the feel of what is right with practice and even if you might sometimes have a bit of a disaster the bread tends to be edible in any case.
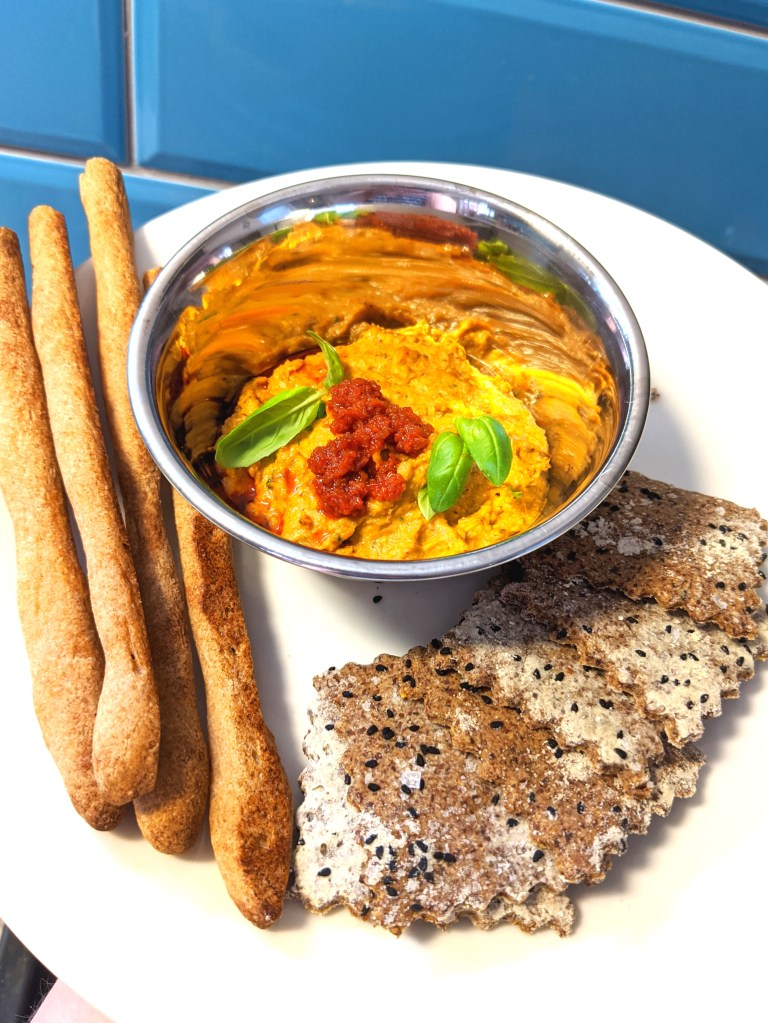
I’m so happy I made the decision to learn how to make gf sourdough. The breads, crumpets, baguettes, waffles etc. are so worth the time, effort and a bit of money invested. Have a look at the other things I’ve done!
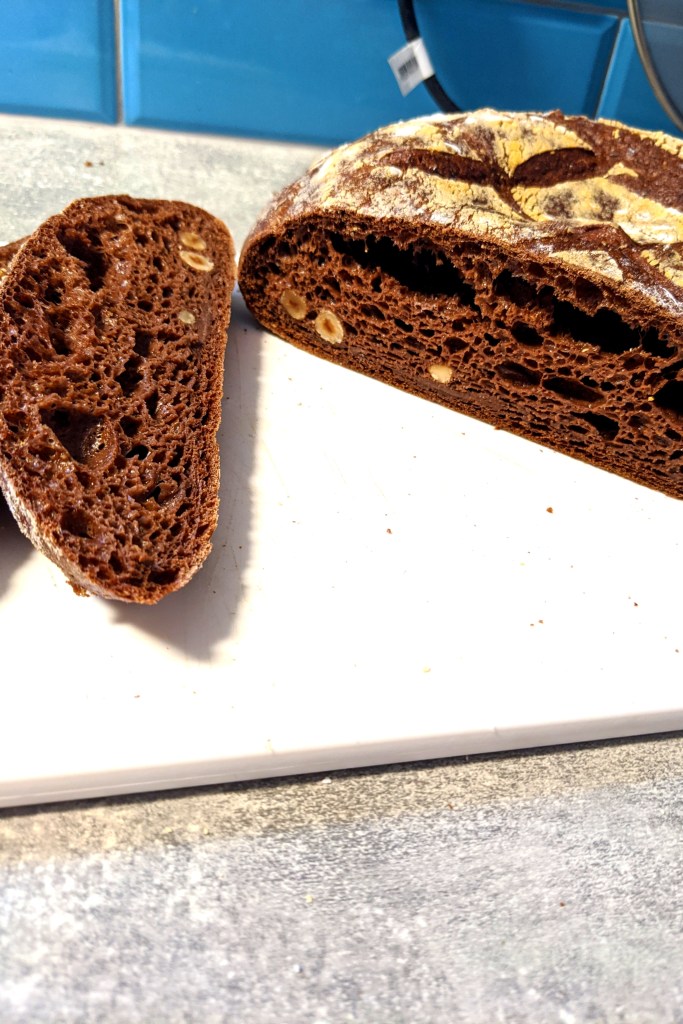
Now that I’ve gotten into the routine of baking and getting pretty consistent results, I’m looking forward to extending my skills and trying out recipes. GF Finnish cardamom buns with the sourdough and pizza crust are going to be in the pipeline for me to figure out next.
Do leave me a comment on how you like my bakes and if I have inspired you to make sourdough. You can also leave suggestions for things to make!

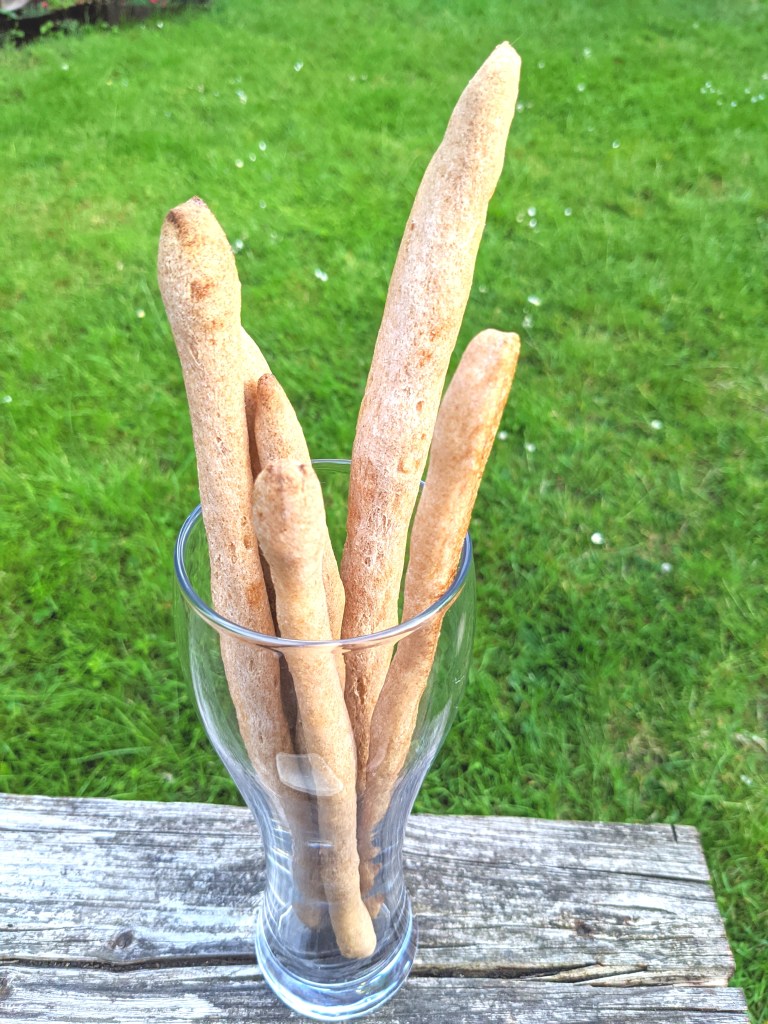
I’m really impressed with your grissini but mine never come out like that. I suspect it’s about the mix I’m using to make my starter – may I please ask what flour combination you uses?
Hi Cormac! I am so happy you reached out. I think the flour mix does make a difference in the results but I do think also the amount of psyllium and how hydrated the dough is affects it. My starter has equal parts quinoa, buckwheat and teff so if yours is for example brown rice, the results would be quite different. I would love to know what you are using and how you would want to improve your grissini!
LikeLike